
Adding your logo, product details or handling instructions turns packaging into a practical communication tool. It can help people recognise your brand, identify what is inside and understand how the box should be stored or handled.
But how do you print on a cardboard box, and what happens between submitting your design and receiving the finished packaging?
In this blog, we’re taking you through the box-printing process step by step and answering some of the most common questions about printed corrugated packaging.
What can be printed on a cardboard box?
Flexographic printing is particularly effective for straightforward branding and practical information.
It can be used for:
- Logos and company names
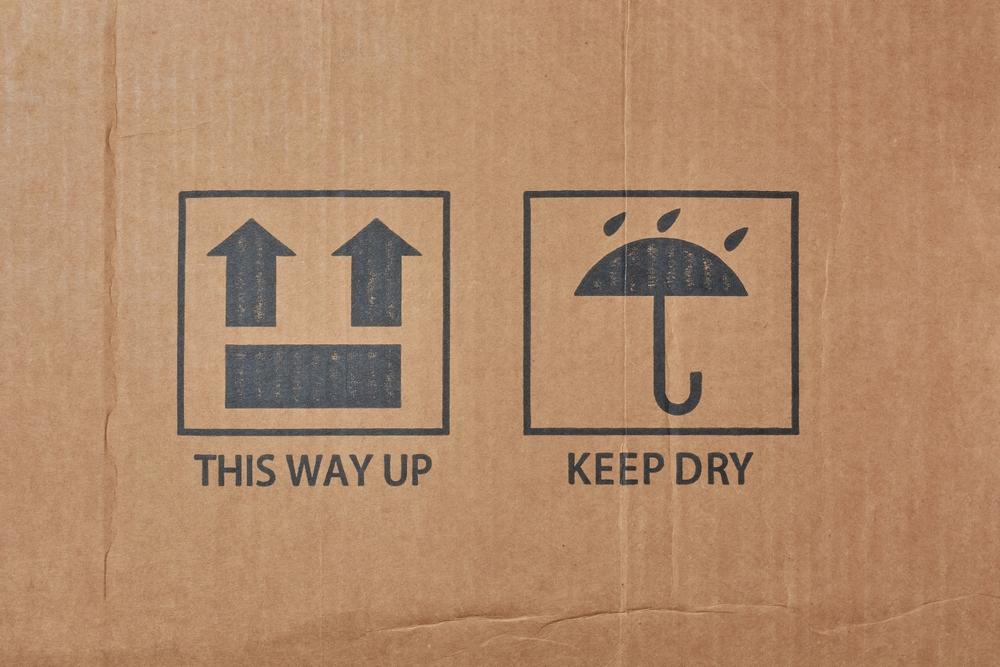
- Delivery and handling symbols
- Product identification
- Storage instructions
- Recycling guidance
- Safety messages
- Contact information
- Simple illustrations and patterns
If you are unsure whether your existing artwork is suitable, the design can be reviewed and adapted for the box, printing method and three-colour limit.
Can you print directly onto cardboard?
Yes. Designs can be printed directly onto corrugated cardboard before the material is converted into a finished box.
At Lesters, we use flexographic printing. Often shortened to flexo printing, this method uses flexible printing plates and fast-drying, water-based inks to transfer a design onto the corrugated board.
It is a high-speed and cost-effective process that works particularly well for larger packaging volumes. It can be used to print logos, product information, handling instructions, recycling messages and simple graphics directly onto a box.
So, how does it all come together? We’ll walk you through it in steps.
Step 1: Decide what your box needs to say
Before choosing colours or finalising your artwork, think about what the print needs to achieve.
Ask yourself these questions: Do you want customers to recognise your brand immediately? Does the box need to display handling instructions? Would product codes make stock easier to identify in a warehouse?
You may want to include:
- Your company name and logo
- Product names or descriptions
- Handling and storage instructions
- Safety warnings
- Recycling information
- Product codes
- Contact details
- A website address
- Simple graphics or patterns
Try not to make the design do too much. Clear, well-positioned information is usually more effective than filling every available space.
Step 2: Choose the right cardboard box
The box itself needs to be right before printing begins.
Its size, style and strength should be based on the product it needs to protect, as well as how it will be packed, stored and transported. The surface and construction of the corrugated board can also influence how the finished print appears.
That is why the packaging should be considered as a complete design. Eye-catching print is valuable, but the box must still perform its main job properly. Let us do the work with our bespoke packaging solution to suit your unique requirements.
At Lesters, we look at the wider packaging requirements before helping customers develop an appropriate printed solution.
Step 3: Prepare your artwork
Once you know what the box needs to communicate, the artwork can be prepared for printing.
This involves deciding where each element should appear and making sure important information remains clear when the flat sheet of board is cut, creased and folded into shape.
For example, you will need to consider:
- Which panel should display the logo
- Where handling instructions will be easiest to see
- Whether text will remain legible at the chosen size
- How the design will look once the box is assembled
- Whether any elements are too close to a fold, cut or join
Packaging artwork needs to work with the structure of the box, not simply look good as a flat design.
Step 4: Select your print colours
Lesters’ printing machinery can print a maximum of three colours.
Working with one, two or three colours can still produce a bold and recognisable design. In fact, limiting the colour palette can help keep packaging clear, consistent and easy to understand.
A single-colour logo can create a strong result, while two or three carefully chosen colours can be used to separate information, highlight instructions or bring more personality to the box.
The aim is not to use every available colour simply because you can. It is to make each colour earn its place.
Step 5: Create the flexible printing plates
Flexographic printing uses flexible plates to apply the artwork to the corrugated board.
A plate is created for the design, with separate plates required for the different print colours. The raised areas of each plate pick up the ink and transfer it onto the board as it moves through the printing machinery.
You can think of it as a highly efficient, carefully controlled stamp – only one designed to deliver consistent results across large packaging runs.
Step 6: Apply the water-based ink
The printing plates are coated with the selected fast-drying, water-based inks.
Each colour is applied separately and must line up correctly with the other elements of the design. Accurate positioning is especially important when colours sit close together or form different parts of the same image.
Because the inks dry quickly, the printed board can continue efficiently through the manufacturing process.
Step 7: Print the design onto the board
The corrugated board passes through the machinery, where the flexible plates transfer the design directly onto its surface.
The process is fast and repeatable, making it well suited to larger order quantities. Whether the print features a prominent logo or simple handling instructions, the aim is to achieve clear and reliable results across the full production run.
At this stage, the board is still flat. It may display all the panels of the box together, ready to be converted into its final shape.
Step 8: Cut, crease, fold and glue the box
Printing is only one part of the production process.
After the design has been applied, the corrugated board is cut and creased according to the box specification. Depending on the packaging style, it may then be folded and glued to create the finished box.
This is when the flat print design takes its final form, with each logo, message and instruction appearing on its intended panel.
Step 9: Check the finished packaging
The completed packaging should be checked to make sure the print is clear, correctly positioned and consistent.
However, appearance is not the only consideration. The box should also meet the original requirements for size, structure and strength.
The final result should be packaging that looks professional, communicates clearly and protects the product throughout its journey.
What ink is used to print on cardboard boxes?
Lesters uses fast-drying, water-based inks for flexographic printing.
These inks are suited to the speed of the process and allow the board to move efficiently through the following stages of production.
The finished colour may appear slightly different on corrugated cardboard than it does on a bright digital screen or a sheet of glossy paper. The material underneath the ink affects the final appearance, so this should be considered when choosing colours.
What is flexographic printing?
Flexographic printing – often shortened to flexo printing – is a fast and cost-effective way to print directly onto corrugated cardboard.
It uses flexible printing plates and fast-drying, water-based inks to apply a design to the surface of the board. This makes it particularly well suited to producing clear, consistent prints across larger packaging volumes.
In simple terms, your packaging is doing more than carrying your product. It is carrying your branding and messaging too.
Why choose flexographic printing for corrugated packaging?
Flexographic printing brings several practical and commercial benefits.
It keeps your brand visible
Every box that leaves your site is an opportunity to put your name in front of customers, suppliers and anyone else who handles it along the way.
It communicates important information
Clear handling instructions can help people understand how a package should be stored, moved or opened. Product details can also make boxes easier to identify within a busy warehouse or distribution centre.
It works well for larger volumes
Flexographic printing is a high-speed process that can produce consistent designs across substantial packaging orders.
It uses fast-drying, water-based inks
The inks dry quickly, helping the printed board move efficiently through the wider manufacturing process.
It delivers clear, dependable results
From a bold logo to straightforward handling instructions, flexographic printing produces sharp and reliable designs directly on corrugated cardboard.
Is flexographic printing suitable for large orders?
Yes. Speed, consistency and cost-effectiveness make flexographic printing particularly well suited to larger production volumes.
Once the artwork and printing plates are prepared, the same design can be reproduced efficiently across a large quantity of corrugated boxes.
It is a practical choice for businesses that regularly require branded packaging, product boxes or cartons carrying the same handling and identification information.
Ready to put your brand on the box?
Printing on corrugated cardboard can turn essential packaging into an extension of your brand.
Whether you need a bold logo, practical handling instructions or clear product information, Lesters can help you create packaging that looks good, communicates effectively and performs throughout storage and transport.
Speak to the Lesters Packaging team about your printed corrugated packaging requirements.
Because at Lesters Packaging, We Deliver More.